WebM is coming up on its second anniversary. Released by Google as a royalty-free alternative to MP4, the video format has slowly gained traction on the web. MP4 still rules by a wide margin, but WebM has dethroned Ogg as the other leading format for HTML5 video.
This post describes two tools for encoding WebM videos: a desktop client and a cloud service. Both are free, easy to set-up and painless to understand. Which one you choose depends upon your personal preference – or the restrictions your company’s IT department imposes.
Desktop Encoding
For desktop encoding, Firefogg is the best option. It is not a standalone tool, but an addon for the Firefox web browser. If you have Firefox installed, go to Tools » Addons to search for and install Firefogg. If you don’t have Firefox, get it here.
With Firefogg installed, go to Tools » Make Web Video to start an encode. Now select your original video, select your output preset (360p is a good one) and click encode. Firefogg starts crunching and minutes later your WebM video will be done.
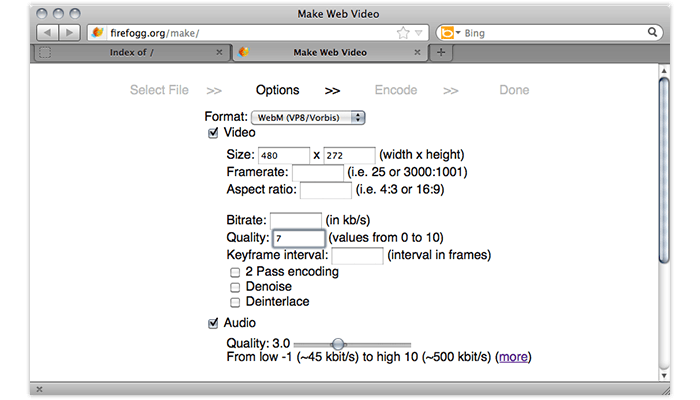
Select Advanced Options in step 2 to customize the video Size and the audio/video Quality. The sweet spot for video quality seems to be 7 (smallest file without artifacts). The sweet spot for audio is 3 (112 kbps). Be sure not to change any of the other options, unless you know what you’re doing!
That is it on the desktop side – short and simple. Firefogg may not have the best looks, but it gets the job done. If you’re looking for something more professional, check out Sorenson Squeeze. It has many more options, but is also not free.
Cloud Encoding
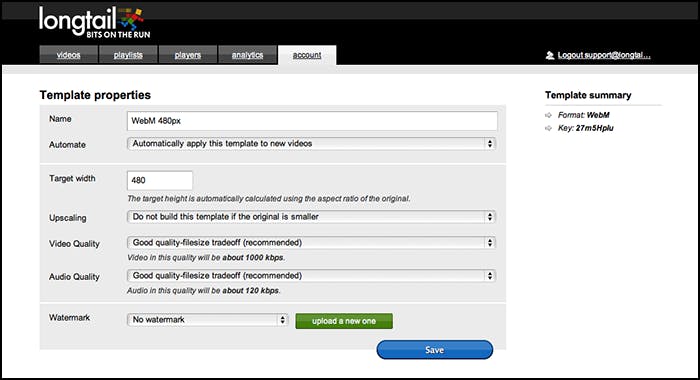
Now let’s go online. Our very own online video platform, Bits on the Run, is easy, free and capable of WebM encoding. Sign up for a Free Account and log-in to the dashboard. Go to Account » Settings » Templates and click Add new Template to create an encoding template. Set the format to WebM Video.
On the next page, set the Target width to 480 pixels and the audio/video quality to the good tradeoff option. This gets you the same results as the Firefogg settings above. Next, set the Automate option to Automatically apply, so your WebM video are automatically built every time you upload a new original. Save the template.
Now go to the Videos section to upload an original video. When the upload is complete, go to the Transcodes tab to see the encoding progress. Your WebM template is listed here. When the WebM transcode is done processing, you can click its yellow Publish icon to copy/paste its URL, or to download it to your computer.
Like Firefogg, Bits on the Run provides a basic encoding interface with only the essential controls. A dedicated transcoding service like Zencoder.com offers many more options, but is also much harder to use.
The End Result
If you’re reading this post in Chrome, Firefox or Opera, the resulting WebM video can be seen below. It is embedded using this JW Player setup. The unavoidable MP4 version is encoded separately, so Internet Explorer and Safari users are not left out:
Video footage above credited to Matt Trunks, full portfolio here.That is all for now! Much more info can be found on the WebM project site. In particular, this page has a wealth of information about encoding parameters. Visit their blog for news on hardware, software and ecosystem support.